Configure AVR Studio
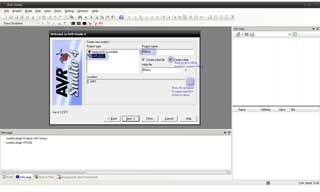
Open AVR Studio from your program list. Select New Project in the window and Click Next.
Select "AVR GCC" in project type. Provide a name for your project and the location (Project Directory) where you want the files to be stored. "Create folder" checkbox will be unchecked by default and checking creates separate folder for each of your project. Do not add extension to your project name as .c or .hex.
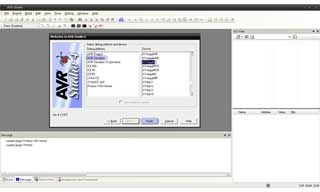
In the next window, select "AVR Simulator" under Debug platform, and the AVR device you have chosen (ATmega8 is selected here) and click finish.
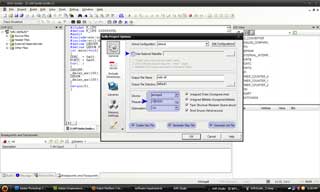
This opens up your default AVR Studio window. If any sub-window or toolbar is not visible, then enable it by going to View -> Toolbar and then the required option can be checked. Now select Project -> Configuration Options from menubar.
Here you can set the frequency and optimization level required. Frequency is set to 1000000 in this case and optimization is set to -Os. If you need to use an external "makefile", check "Use External Makefile" option and browse for the required makefile. If this is not checked, AVR Studio creates a makefile in the "default" folder within the project directory.
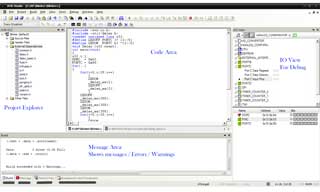
Click OK to return to the main AVR Studio window. This is the place where you write your code, debug, build etc., etc.,
Type, Copy Paste, or do whatever you want and get your program into the code area. Click "Build -> Build" (or Alt-B-B or even F7). If you are compiling it again, you can use "Build -> Rebuild All" option. If your program is good enough then you get a message "Build succeeded with 0 Warnings...". All set and you are successful in building your program.
Open the Project directory where you find your xxx.c file, default folder and other supporting files. Open default folder where you find another set of files. xxx.hex is the intel hex file which is of interest and the file which you upload into your microcontroller. You can also find makefile created in this directory.
Next we will see how to install PonyProg and upload the .hex file into the microcontroller.
Do you have anything to say?
Visit the Forum to discuss, learn and share anything related to robotics and electronics !!


