PCB Etching tutorial
Etching Process
Etchant in simple words is a corrosive chemical or an acid which is used for etching. In this tutorial, the etchant is a solution of hydrochloric acid and hydrogen peroxide. Most of them use the messy ferric chloride which I would never suggest. You can also use ammonium persulfate if available with water. Ammonium Persulfate is clean when compared to ferric chloride and not as dangerous as storing HCl and H2O2.
Making the etchant
HCl is mostly available as muriatic acid or pool acid in most hardware stores. Hydrogen peroxide is mostly available in pharmacies in 3% to 5% concentration. In my case I bought HCl and Peroxide from a chemical store. The container with a blue cap is peroxide and the one with a red cap is Acid. This way I can easily identify the the difference between Acid and Water.
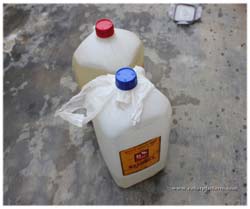
Mix 2 parts of HCl to 3 parts of H2O2 in a plastic container. Remember to always add acid (HCl) to water (in this case H2O2). Do not attempt the other way. The ratio of 1:2, 2:3 or 3:5 of acid and water is based on the concentration level of the acid you purchased.
When you remove the lid of HCl container, it emits a foul smell which makes you uneasy. Wear masks and add HCl. Do not touch the acid and if it happens, then use cold water and immediately wash your hands.
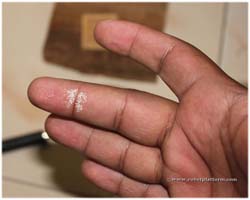
Touching H2O2 may not seem dangerous. But, it creates a temporary whitish burnt effect on your skin. In the image you can see what happened to my skin when I accidently touched peroxide.
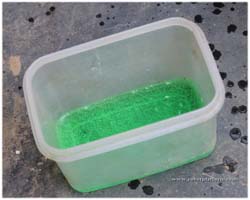
Once you mix both the liquids, the solution is a clear liquid. When the etching is complete, it turns greenish. Since I am reusing the older solution, it is already green. Efficiency of any etchant degrades with time. So make sure you prepare only enough solution required. Be informed that HCl alone does not attack copper and needs hydrogen peroxide as an oxidizing agent. Since peroxide is very unstable, it decomposes with light and turns into water. For reusing it, add a little bit of peroxide into existing solution and make it reusable.
Caution: Make sure to not immediately close the lid of the container if you have an air tight container. In my experiment, I have seen that the container just bursts and throws out the liquid. Since I am not a chemist, not sure what chemical reaction initiated this.
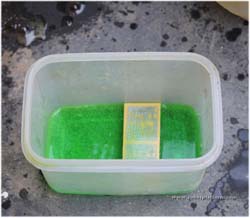
Once the solution is prepared, carefully dip the circuit into the solution. Wear gloves if necessary to avoid any contact with the solution. If you have a stronger etchant, it requires just a few seconds to remove all unwanted copper from the board making the substrate visible. More the acid (No more than 1:1), faster the process, but at the same time you risk removing a few tracks.
Make sure you experiment in open space with proper ventilation as this releases dangerous fumes. Some argue that the fume is pure oxygen (2H2O2 = 2 H2O + O2), but I doubt it as HCl might contaminate the oxygen. Hence consider it safe not to inhale it.
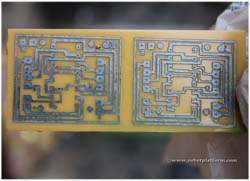
Remove the circuit board from the etchant; thoroughly clean it in water and see if you can find any breaks in tracks. In case you find it, then there is no going back but can cover it up while soldering.
Tutorial index:
Do you have anything to say?
Visit the Forum to discuss, learn and share anything related to robotics and electronics !!

